
Corrosion poses a significant threat to the longevity and safety of metals and coatings used across vast industries. Understanding a material’s ability to withstand corrosive environments is critical for ensuring reliability and durability. This article covers the most widely used corrosion testing methods/techniques, their procedures, applicable standards, and the necessary equipment for each test. Besides that, we’ll provide a deep look at the salt spray test.

What Is the Corrosion Test?
Corrosion testing involves different procedures used to evaluate how well materials, especially metals and their coatings, can resist the damaging effects of corrosion. Corrosion occurs when metals react chemically with their environment, leading to rust, deterioration, and ultimately, failure of components. The main purpose of the corrosion test is to ensure that protective coatings or materials can withstand corrosive conditions, thereby guaranteeing the durability and proper function of parts exposed to harsh environments.
These tests simulate corrosive conditions in a controlled and accelerated way to predict how materials will behave over time. By doing so, engineers and manufacturers can assess the longevity, reliability, and effectiveness of both the base materials and their protective coatings before they are used in real-life applications. This helps prevent unexpected failures, costly repairs, and safety issues.
Different Types of Corrosion Testing Methods
Corrosion testing methods vary depending on the industry and specific requirements. For example, standards set by organizations such as DIN or ISO, or regulations from automobile manufacturers, may dictate different testing techniques. Here are some common types of corrosion tests with their standards, procedures, applications, etc.
1. Salt Spray Test (SST)
The salt spray test, also known as the salt fog test or SST corrosion test, is a highly standardized and widely used accelerated corrosion test that exposes coated or uncoated metal samples to a controlled, highly corrosive environment inside a sealed chamber. This environment is created by spraying a fine mist of a saltwater solution (usually sodium chloride) onto the samples. The salty fog simulates harsh conditions like those found in marine or industrial atmospheres, which cause materials to corrode more quickly.
What Is the Purpose of the Salt Spray Test?
The primary use of the salt spray test is to assess the durability and effectiveness of protective coatings against corrosion. By observing how long a coating can resist the formation of rust or other corrosion products during the test, manufacturers and engineers can compare different coatings or materials quickly and predict how the products will perform over time in actual use.
Types of Salt Spray Tests
There are different types of salt spray tests based on the DIN EN ISO 9227 standard, including Neutral Salt Spray (NSS), Acetic Acid Salt Spray (AASS), and Copper-Accelerated Salt Spray (CASS).
Procedure (How to Conduct NSS Test)
- Test samples are placed in the rack so they only touch at a few points and are positioned at an angle of 15–25° to the vertical to prevent condensate dripping onto samples below.
- Standard specimen size is usually 75 × 150 mm, but other sizes may be used according to specific test requirements.
- A 5% NaCl solution (50 ± 5 g/L) with a pH of 6.5 to 7.2 is atomized inside the test chamber to create a dense saline fog.
- The temperature inside the test chamber is maintained at 35 ± 2°C throughout the test duration.
- The spray nozzle operates at an overpressure of 0.7 to 1.4 bar, delivering salt solution at a collection rate of 1–2 mL per hour per 80 cm² of surface.
- Test specimens are cleaned and degreased before testing to avoid unintended chemical reactions.
- The exposure duration varies depending on product specifications and can range from a few hours to several days or weeks.
- During the test, temperature, humidity, and salt concentration are continuously monitored and documented to ensure consistent conditions.
- After the exposure period, samples are removed from the chamber and rinsed if necessary to wash away loose corrosion products.
- The inspected samples are visually evaluated for corrosion signs such as red rust, white rust, blistering, corrosion creep, or pitting.
- Additional evaluations may include recording the time until the first corrosion appears, defect counting, mass change measurements, or microstructural analysis.
Standards
- ASTM B117
- UNI EN ISO 9227:2006
- JIS Z 2371
- ASTM G85
Equipment
- Salt spray test chamber with temperature and humidity control.
- Salt solution reservoir and spray nozzles.
- pH meter for solution monitoring.
2. Cyclic Corrosion Testing (CCT)
Cyclic Corrosion Testing (CCT) is an advanced laboratory technique that simulates and accelerates the corrosion processes that materials experience in real-world environments. Unlike traditional corrosion tests, such as the salt spray test, CCT replicates the natural cyclic changes in the environment by cycling samples through different environmental conditions automatically within a controlled chamber, mimicking salt fog, drying phases, and humid or condensation phases. By doing so, CCT generates corrosion damage patterns, such as rust, blistering, and crevice corrosion, that closely resemble those occurring naturally but in a much shorter timeframe. The test can evaluate various corrosion mechanisms, including general corrosion, galvanic corrosion, and crevice corrosion. CCT was developed mainly within the automotive industry in response to the limitations of the standard salt spray test, which often fails to correlate well with actual atmospheric corrosion experienced by vehicles.
Procedure
- Sample Preparation: Clean test specimens with distilled or demineralized water and dry them with absorbent paper before testing.
- Test Setup: Place samples in a corrosion chamber that simulates natural pollution by exposing them to controlled salt spray, humidity, temperature, and drying cycles.
- Salt Spray Exposure: Expose samples periodically to a saline mist (typically 1% NaCl solution at about 35°C) for a set time to simulate chloride ion pollution.
- Humidity and Moisture Phase: Expose samples to high relative humidity (around 95%) at elevated temperatures (usually 35–50°C) to replicate moist, corrosive conditions.
- Controlled Drying Phase: Subject samples to lower humidity (20–55%) and moderate to high temperatures (35–60°C) to simulate drying periods between wet exposures.
- Cycle Repetition: Repeat the above phases in cycles varying in duration (8 to 24 hours per cycle) and total number (from 18 to 63 or more), depending on the specific test protocol.
- Intermediate Examinations: Inspect samples at specified cycle intervals (e.g., after 6, 21, 30, 48, or 63 cycles) to check for corrosion products and damage on surfaces, edges, and interfaces.
- Post-Test Cleaning: After completing the cycles, rinse samples lightly with demineralized water and dry before final analysis.
- Damage Evaluation (for coated specimens): For painted samples, score lines through the coating before testing and measure corrosion progression and paint adhesion loss after certain cycle numbers using methods like tape pull-off tests.
- Result Analysis: Assess corrosion by noting the presence of rust, blistering, paint lifting, and the extent of corrosion spreading from scribed lines, to determine the corrosion resistance of coatings or materials.
Standards
- ASTM G85
- ISO 9227
Equipment
- Cyclic corrosion test chamber with programmable temperature, humidity, and salt spray control.
- Salt spray nozzles and solution reservoirs.
- Environmental sensors to monitor pH, temperature, and relative humidity.
3. Electrochemical Corrosion Testing
Electrochemical corrosion testing is a technique that evaluates the corrosion resistance of metals and alloys by analyzing their electrochemical behavior when exposed to corrosive environments. This method involves immersing a test specimen—commonly a metal or alloy—into a specially chosen electrolyte solution that simulates the corrosive conditions the material might encounter in actual use. By monitoring the electrical potential and current flow between the specimen (working electrode) and a reference electrode within the solution, the test provides quantitative data on how the metal reacts electrochemically, which directly relates to its susceptibility to corrosion. The principle behind this testing is based on the electrochemical nature of corrosion, which involves oxidation and reduction reactions. As the metal corrodes, it releases electrons (oxidation), which flow through the metal and are consumed by reduction reactions in the electrolyte. Measuring these electron flows (currents) and potentials enables characterization of corrosion rates and mechanisms. Additionally, by applying controlled voltages or currents, the test can accelerate corrosion processes, simulating long-term environmental effects within a shorter timeframe.
Procedure
- Specimen Preparation: Clean and prepare the metal or alloy specimen to ensure a consistent and reproducible surface for testing.
- Setup of Electrochemical Cell: Place the specimen (working electrode), reference electrode, and counter electrode into an electrolyte solution that mimics the test environment.
- Connection to Potentiostat: Connect the electrodes to a potentiostat instrument to control and measure the electrical potential and current.
- Equilibration: Allow the specimen to stabilize in the electrolyte to reach a steady-state corrosion potential (open circuit potential).
- Apply Test Voltage or Current: Perform the desired electrochemical test (e.g., potentiodynamic polarization, linear polarization resistance) by applying a controlled potential or current to the working electrode.
- Data Acquisition: Record the current response versus the applied potential or time, depending on the test type.
- Data Analysis: Analyze the resulting curves and measurements to extract corrosion parameters such as corrosion potential, corrosion current density, polarization resistance, and corrosion rate.
- Interpretation: Use the data to assess corrosion susceptibility, passivation behavior, or galvanic corrosion risks and compare materials or surface treatments.
- Report Results: Document findings for engineering decisions on material selection, protective coatings, or further testing needs.
Standards
- ASTM F2129
- ASTM G71
- ASTM G59
Equipment
- Working electrode
- Reference electrode
- Counter electrode
- Electrolyte solution
- Potentiostat
4. Intergranular Corrosion (IGC) Testing
Intergranular corrosion testing is a specialized evaluation technique to detect and measure the susceptibility of metals, particularly alloys like austenitic stainless steels and nickel-based alloys, to intergranular corrosion (IGC). Intergranular corrosion is a form of localized corrosion that attacks the grain boundaries (interfaces between crystallites or grains) rather than the grains themselves. This often occurs in alloys that are otherwise corrosion-resistant but have undergone specific heat treatments or welding processes, leading to sensitization, a condition where chromium or other protective elements are depleted at the grain boundaries due to precipitation of compounds like chromium carbides. The testing is important because intergranular corrosion can severely weaken the mechanical integrity of metals without obvious external signs, making the material prone to unexpected failures in critical applications such as aerospace, nuclear, chemical processing, and infrastructure. The testing works by exposing metal specimens to aggressive chemical solutions under controlled temperatures and times that promote corrosion along grain boundaries if the material is susceptible. The degree of attack is then evaluated visually or through weight loss, microstructural examination, or mechanical testing.
Procedure
- Sample Preparation: Cut and prepare the metal specimen to the required dimensions and surface finish.
- Cleaning: Clean the specimen thoroughly to remove any grease, dirt, or oxides that could affect the test.
- Sensitization (if applicable): Heat treat the specimen at specific temperatures (typically 500–800°C for stainless steels) to induce sensitization and chromium carbide precipitation.
- Chemical Exposure: Immerse the specimen in a specific corrosive chemical solution (e.g., oxalic acid, ferric sulfate-sulfuric acid, nitric acid, copper sulfate-sulfuric acid) at controlled temperature and duration according to the chosen test method.
- Rinse and Dry: After exposure, rinse the specimen with distilled water and dry it properly to stop the reaction.
- Evaluation: Examine the specimen for corrosion attack—this could include visual inspection, microscopic examination of grain boundaries, measuring weight loss, or mechanical testing (e.g., Charpy impact test).
- Interpretation: Compare the results against standard criteria to determine susceptibility to intergranular corrosion.
Standards
- ASTM A262 (stainless steels)
- ASTM G28 (nickel alloys)
Equipment
- Furnace or heat treatment oven
- Chemical baths/containers
- Temperature control system
- Analytical balance
- Microscope (optical or metallurgical)
- Etching equipment
- Safety equipment
5. Copper Strip Corrosion Test
The copper strip corrosion test is a standardized laboratory method used to check the corrosive effects of petroleum products, such as fuels and lubricants, on metals, specifically copper. Its primary purpose is to assess the relative degree of corrosivity of a petroleum product by simulating its interaction with copper under controlled conditions of temperature and time. Crude petroleum contains sulfur compounds, many of which are removed during refining; however, the residual sulfur compounds can still cause metal corrosion. This corrosivity is not directly proportional to the total sulfur content but depends on the chemical nature of the sulfur species present. In the test, a polished copper strip is immersed in a measured volume of the petroleum sample and heated under specified conditions. After the heating period, the strip is removed, cleaned, and visually examined for tarnish or corrosion. The resulting discoloration or tarnish on the copper strip is compared against a set of standardized color plaques defined by ASTM to classify the level of corrosivity. The test is widely used in the petroleum industry as part of quality control and specification compliance processes for fuels, solvents, and oils.
Procedure
- Prepare the copper strip by polishing it to a controlled surface finish, removing all blemishes and oxidation.
- Place 30 mL of the petroleum sample, free of suspended water, into a clean, dry glass test tube.
Immediately after polishing, immerse the copper strip into the sample inside the test tube. - Seal the test tube (or place it inside a pressure vessel for certain fuels) and heat it in a temperature-controlled bath at the specified temperature for the prescribed time.
- After heating, remove the test tube or vessel from the bath and cool it by immersion in water if applicable.
- Withdraw the copper strip using forceps and wash it immediately with a suitable solvent to remove residual sample.
- Dry the strip and visually compare the tarnish and color against ASTM Copper Strip Corrosion Standard plaques under consistent lighting.
- Classify the corrosion rating according to the closest matching standard plaque.
Standards
- ASTM D130 (Standard Test Method for Corrosiveness to Copper from Petroleum Products)
Equipment
- Copper strip corrosion pressure vessel
- Borosilicate glass test tubes
- Temperature-controlled test baths
- Temperature sensing devices
- Polishing vise and abrasives
- Forceps
- Wash solvent
- Timing device
- Viewing tubes and ASTM standard plaques
6. Immersion Testing
Immersion corrosion testing is a widely used laboratory method to evaluate the corrosion resistance of materials when exposed to aggressive liquid environments. In this test, material samples—often referred to as corrosion coupons—are fully submerged in a controlled corrosive solution, such as a saltwater solution or acidic medium, for a predetermined period. After the test, analyze factors such as material weight loss, corrosion rate, and surface degradation to determine the type and severity of corrosion by both visual inspection and calculation, then complete the evaluation of material performance under the tested conditions. The test is highly valuable in industries like automotive, aerospace, chemical processing, and electronics, where materials and protective coatings must withstand exposure to moisture, salt, acids, or other corrosive agents.
Procedure
- Specimen Preparation: Cut and shape the sample coupons to standard dimensions, optionally applying stresses or crevice formers to simulate real conditions.
- Pre-Test Cleaning: Clean the specimens thoroughly using a nylon brush or non-chlorinated scouring, then rinse with distilled water to remove contaminants.
- Pre-Test Measurements: Measure and record the initial weight and dimensions of each specimen accurately.
- Prepare Test Solution: Formulate the corrosive solution (e.g., 3.5% NaCl) and adjust parameters such as pH and temperature according to the test standard.
- Immersion Setup: Suspend specimens in the solution ensuring no contact between samples or container walls, and maintain controlled temperature, aeration, and agitation as required.
- Exposure: Allow specimens to remain immersed for the specified duration, typically from 24 hours up to several weeks.
- Post-Test Removal: Remove specimens carefully and perform a visual inspection, often with optical magnification, to detect localized corrosion.
- Post-Test Cleaning: Clean corrosion products from the specimens according to standards without removing base metal.
- Final Measurements: Reweigh and measure the specimens after cleaning to determine mass loss.
- Data Analysis: Calculate corrosion rates using the measured mass loss, exposure time, surface area, and specimen density; evaluate corrosion type and severity.
- Reporting: Document all test parameters, observations, measurements, and corrosion rate calculations to support material evaluation and selection.
Standards
- ASTM G31 (Standard Practice for Laboratory Immersion Corrosion Testing of Metals)
Equipment
- Corrosion coupons
- Analytical balance
- Corrosive test solutions
- Test vessels
- Suspension apparatus
- Temperature control systems
- Aeration and agitation equipment
- Cleaning tools
- Optical microscopes or scanning electron microscopes (SEM)
- Data recording and analysis tools
7. Crevice Corrosion Testing
Crevice corrosion testing is a controlled laboratory method usually used to determine how well stainless steels and related alloys withstand localized corrosion that occurs in tight, confined spaces known as crevices. These crevices create environments where corrosive agents concentrate, breaking down the protective oxide layer on metals, which leads to accelerated corrosion. The method employs a ferric chloride solution, which serves as an aggressive, oxidizing chloride environment to speed up the corrosion process. A fixed geometry crevice former is positioned on the metallic specimen to create a consistent crevice space. This setup provokes and measures how quickly crevice corrosion starts and progresses, providing a means to compare different alloys under standardized, reproducible conditions.
Procedure
- Prepare the alloy specimen by mechanically grinding and chemically pickling to remove surface impurities.
- Secure an inert crevice former of known geometry onto the specimen’s surface to simulate a crevice environment.
- Immerse the specimen with the crevice former in a ferric chloride solution maintained at a specified concentration.
- Regulate the solution temperature, either at ambient or elevated levels, to hasten the onset of corrosion.
- Let the specimen soak in the corrosive solution for a fixed time frame, typically 24 to 72 hours.
- Remove the specimen and clean it using standardized methods to eliminate corrosion residues without harming the base metal.
- Examine the surface visually for the presence of pits or crevice corrosion attack.
- Measure the specimen’s weight before and after testing to assess the degree of material loss.
- Document the test parameters and results to facilitate comparison and evaluation of corrosion resistance across materials.
Standards
- ASTM G48 (Standard Test Methods for Pitting and Crevice Corrosion Resistance)
Equipment
- Test coupons made from stainless steel or similar alloys
- Non-reactive crevice formers (e.g., PTFE inserts) to form the crevice
- Ferric chloride solution of controlled concentration and purity
- Temperature-controlled chambers or baths
- Analytical scales for precise weighing
- Tools and chemicals for specimen surface preparation (grinding and pickling)
- Cleaning solutions and equipment for post-test treatment
- Visual aids like microscopes or magnifying glasses
8. Galvanic Corrosion Testing
Galvanic Corrosion Testing is a laboratory and field evaluation method used to study the corrosion behavior of two or more dissimilar metals that are electrically connected while immersed in an electrolyte. When two different metals come into electrical contact in a corrosive aqueous environment, such as saltwater or other electrolytes, an electrochemical reaction occurs where the metal with the more negative electrode potential (the anode) corrodes preferentially to protect the other metal (the cathode). This process, known as galvanic corrosion or contact corrosion, can cause accelerated deterioration of the anodic metal, leading to material failure if not properly managed. This is an important way to understand how various material combinations interact in environments where liquid electrolytes are present but without significant flow that might cause erosion-corrosion or cavitation.
Procedure
- Select the metals or alloys to be tested and prepare their specimens by cleaning and surface finishing to ensure consistent and reproducible surfaces.
- Electrically join the specimens using non-corroding connections such as wires for laboratory tests or physical bonds like threaded rods or brazing for field tests, ensuring the connection does not introduce additional corrosion effects.
- Mount the coupled specimens in non-conductive holders that prevent contamination or crevice corrosion during testing.
- Immerse the assembly in a chosen electrolyte solution, typically simulating the service environment, ensuring the electrolyte is at rest or low flow to avoid erosion-corrosion effects.
- Maintain the exposure for a predetermined time sufficient to simulate service life or to reach steady-state corrosion behavior.
- Measure galvanic current and potential difference regularly during the exposure to monitor corrosion activity.
- Remove the specimens according to a planned schedule and clean off corrosion products carefully using standardized methods without damaging the base metal.
- Conduct visual inspections and document the appearance of corrosion, including photographing the specimens before and after cleaning.
- Weigh the specimens before and after exposure to calculate metal loss, or use alternative evaluation methods such as thickness measurements or metallographic analysis if mass loss measurement is not feasible.
- Compare corrosion rates and behaviors of coupled specimens with those of uncoupled control specimens to assess the galvanic effect and calculate acceleration factors.
- Analyze data statistically if multiple replicates are tested to estimate confidence intervals and improve predictive reliability.
- Prepare a detailed report including specimen descriptions, test conditions, environmental data, corrosion results, and any observations relevant to galvanic corrosion behavior.
Standards
- ASTM G71 (Standard Guide for Conducting and Evaluating Galvanic Corrosion Tests)
Equipment
- Metal specimens of selected alloys and metals
- Electrical connection materials
- Non-conductive specimen holders or mounts
- Electrolyte solutions representative of service environments
- Controlled environment tanks or corrosion cells
- Potentiostat or zero-resistance ammeter (ZRA)
- An analytical balance with high precision
- Surface preparation tools
- Cleaning brushes and scrapers
- Magnification devices (microscope, magnifying glass)
- Cameras for photographic documentation
When it comes to other types, humidity testing is a method to estimate the influence of moisture on corrosion, but not as a direct corrosion test like salt spray or cyclic corrosion tests. There are lots of ASTM standards for corrosion testing; you can find the appropriate procedures and measurements to examine and evaluate the extent of corrosion resistance of a certain material.
Main Use of Salt Spray Test
The salt spray test is primarily used for quality control rather than predicting actual long-term corrosion resistance in real-world conditions. It helps manufacturers monitor coating processes such as pre-treatment, painting, electroplating, and galvanizing. For example, painted components often must withstand a specified duration (such as 96 hours) in a neutral salt spray environment to meet production quality standards. Failure in this test signals issues in the coating or pre-treatment process that require immediate correction to prevent defective products.
Salt Spray Test Duration
The salt spray corrosion testing hours varies greatly because of the materials and standards, typically ranging from 24 to 1000+ hours.
According to DIN EN ISO 9227, the NSS test generally lasts 96 hours, 240 hours, 480 hours, 720 hours, etc. While in the ASTM B117 standard, the test duration for salt spray is typically 24 to 72 hours, and can also be extended to several hundred and even 1000 hours.
Salt Spray Test Hours Equivalent to Years (Real Life)
The salt spray test can be divided into natural exposure testing and artificial accelerated testing. The artificial test uses specialized equipment—salt spray chambers—to create a highly concentrated salt mist environment, typically with chloride levels many times higher than those found in natural settings. This intense environment speeds up corrosion processes significantly, allowing results that might take a year or more outdoors to be obtained in just a day or so in the lab. For instance, a product that corrodes after one year of natural exposure may show similar corrosion after only 24 hours in a neutral salt spray test. Different types of accelerated salt spray tests exist, each with varying corrosion rates.
- Neutral Salt Spray (NSS) test is roughly equivalent to 24 hours of testing to one year of natural exposure.
- Acetic Acid Salt Spray (ASS) test has a 24-hour duration, corresponding to about three years outdoors.
- Copper Accelerated Salt Spray (CASS) test, 24 hours in the lab, is roughly equivalent to 8 years in the real-life environment.
What Are the Results of Salt Spray Tests?
Salt spray testing, conducted according to ASTM B117, helps identify differences in corrosion resistance among various materials and coatings by exposing them to a controlled salt fog environment. For example, if a coating is scratched, salt spray testing combined with related methods like ASTM D1654 can reveal how corrosion spreads from the damaged area and assess the coating’s adhesion strength. The results typically come from visual inspections or measuring mass loss, providing a corrosion severity rating that ranges from 0 (no corrosion) to 10 (severe corrosion).
To illustrate, consider stainless steel grades tested under ASTM B117: a 316 stainless steel sample might withstand a 96-hour exposure in a 3% salt spray solution without visible corrosion, indicating good resistance. Meanwhile, 304 stainless steel could fail under the same conditions but might perform adequately if the salt concentration is lowered to 0.3% and the test is extended to 120 hours. Such data is valuable for selecting the right material or coating for applications exposed to chloride environments.
Salt spray tests may also produce physical effects: crystallized salt clogging or binding moving mechanical parts, or electrical impairment, where conductive corrosion products and hygroscopic salt deposits lower insulation resistance, increase leakage currents, raise contact resistance, and can ultimately cause short circuits or open circuits.
How to Choose the Right Corrosion-Resistance Test?
1. Start with the service environment
Begin by listing all corrosive factors your part will actually face—such as chlorides, humidity cycles, temperature changes, road salt, seawater, fuel sulfur, microbes, or contact with dissimilar metals. Rank these factors by how severe they are and how long the part will be exposed. Choose tests that realistically simulate the top two or three conditions because this ensures the test results will meaningfully reflect real-world performance.
2. Define the purpose of the test tata
Clarify what you need from the test results. For quick pass/fail quality control on the production line, simple and fast tests like Neutral Salt Spray (NSS) per ASTM B117 are ideal. If you want to compare materials or coatings quantitatively, consider electrochemical methods that measure corrosion rates or barrier properties, or longer-term coupon tests for real corrosion data. To predict long-term durability in specific climates, cyclic corrosion testing (CCT) mimics natural wet/dry cycles and gives more realistic lifetimes.
3. Consider the application or industry
Different industries have preferred tests reflecting their unique environments. For example:
- Automotive uses cyclic corrosion tests plus NSS for quick checks.
- Aerospace may require extended NSS plus additional cycles including UV and temperature shocks.
- Offshore structures depend on seawater immersion, crevice corrosion tests, and microbial corrosion evaluations.
- Electronics need humidity and NSS tests to check connector corrosion and insulation degradation.
- Petroleum fuels call for copper strip corrosion tests to evaluate fluid aggressiveness.
4. Balance speed, cost, and detail
If you need a quick, low-cost check, NSS testing usually takes 24–96 hours and uses affordable equipment. For warranty validation over many years, plan for longer cyclic corrosion tests lasting several weeks or months. For alloy development or detailed corrosion mechanisms, electrochemical techniques provide in-depth insight but require specialized instruments and expertise.
5. Follow relevant specifications
Always check customer drawings, OEM standards, or regulatory codes first. If a specification calls for “500 h NSS per ASTM B117,” simply perform that test. When the requirements are not defined, justify your test choice based on the service environment and the factors identified in step 1.
Related Articles:
 Threaded Fastener Types, Manufacturing, Inspection, Standards (ISO, ASTM, ANSI)
 What is HVOF Coating – HVOF Thermal Spray Process, Materials, Benefits, Machine, Applications
 Welding Defects Definition, Diagram, Types, Causes & Remedies
 What is SS400 Steel – Features, Thickness, Applications, What US Steel is Comparable To It?
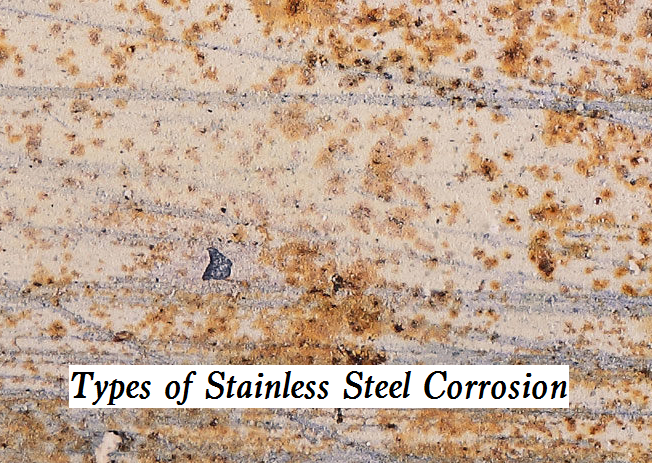 Types of Stainless Steel Corrosion – Corrosion Resistance of Stainless Steel Series
 How to Reduce Corrosion of Metal Parts – Metal Corrosion Prevention Methods