1. Appearance Inspection Before Power On
(1) Machine tool electrical inspection: Open the machine tool electric control box, check whether the relay, contactor, fuse, servo motor speed, control unit socket, spindle motor speed control unit socket are loose.
(2) Check the CNC electric box: Open the door of the CNC electric box, check all kinds of interface sockets, servo motor feedback line sockets, spindle pulse generator sockets, manual pulse generator sockets, CRT sockets, etc. if they are loose, plug them in again, and those with locking mechanism must be locked.
(3) Wiring quality inspection: Check all terminals. It includes the terminals connected by the machine tool manufacturer during the assembly of the strong and weak current parts and the terminals of the power lines of each motor. Each terminal should be fastened once with a screwdriver until it can not be screwed with a screwdriver, and each motor socket must be tightened.
(4) solenoid valve inspection: All solenoid valves should be pushed several times by hand to prevent bad action caused by long-time power failure.
(5) Check the limit switch: Check whether all the limit switches are flexible and fixed firmly, and deal with them immediately if they are found to be bad or not fixed firmly.
(6) Check the buttons and switches on the operation panel: check the wiring of all buttons, switches and indicator lights on the operation panel. If any error is found, handle it immediately. Check the socket and wiring on the CRT unit.
(7) Ground wire inspection: It is required to have a good ground wire. Measure the ground wire of the machine tool, and the ground resistance shall not be greater than 1 Ω. Check the phase sequence of the power supply. Check the phase sequence of the input power supply with the phase sequence meter to make sure that the phase sequence of the input power supply is absolutely consistent with that of the power supply calibrated on the machine tool.
(8) For equipment with secondary wiring, such as power transformer, the consistency of phase sequence of secondary wiring must be confirmed. It is necessary to ensure that the phase sequence is absolutely correct. At this time, the power supply voltage should be measured and recorded.
2. Turn On The Total Voltage Of The CNC Machine Tool
Turn on the main power supply of the machine tool, check whether the rotation direction of the CNC electric box, the cooling fan of the spindle motor, and the cooling fan of the machine tool electrical box is correct, whether the oil mark indication of lubrication, hydraulic pressure, etc. and the machine tool lighting are normal, and whether the fuses are damaged, such as If there is an abnormality, the power supply should be cut off immediately, and the operation can be continued without abnormality. Measure the voltage of each part of the strong current, especially the primary and secondary voltage of the power transformer for CNC and servo unit, and make a record. Observe for oil leakage, especially hydraulic cylinders and solenoid valves for turret indexing, clamping, spindle gear shifting, and chuck clamping.
3. Turn On The CNC Electric Box
Press the CNC power button, turn on the CNC power, and observe the CRT display until the normal screen appears. If the ALARM display appears, you should look for the fault and eliminate it. At this time, you should re-energize and check. Turn on the CNC power supply, and measure the voltages at all levels according to the position of the test terminal given in the relevant information. If there is a deviation, adjust to the given value and make a record. Place the status switch in the appropriate position and select the parameter page. Check the parameters, these parameters should be consistent with the random parameter table. If you find inconsistent parameters, you should find out the meaning of each parameter before deciding whether to modify it. Place the state selector switch at the JOG position, place the jog speed at the lowest gear, and perform jog operations in the positive and negative directions of each coordinate. At the same time, press the overtravel protection switch corresponding to the jog direction by hand to verify its protective effect Then, a slow overtravel test is carried out to verify the correctness of the installation of the overtravel striker. Set the status switch to the zero return position to complete the zero return operation. No other operations can be performed unless the reference point return is completed. Therefore, in this case, you should perform this operation first, and then perform the fourth operation. Put the status switch in JOG position or MDI position, perform manual gear shift test, after verification, put the spindle speed control switch at the lowest position, perform the spindle forward and reverse rotation test of each gear, observe the spindle rotation and the correctness of the speed display , And then gradually increase the speed to the maximum speed, observe the stability of the spindle operation. Carry out manual guide rail lubrication test to make the guide rail have good lubrication. Gradually change the fast-moving overshoot switch and the feedrate override switch, jog the tool post at will, and observe the correctness of the speed change.
4. MDI Test
(1)Measure the actual speed of the spindle, put the lock switch of the machine tool in the on position, input the command with manual data, carry out the test of shifting the spindle at will, measure the actual speed of the spindle, observe the speed display value of the spindle, and adjust the error within 5%.
(2)The tool selection test of turret or turret is carried out to check the accuracy of turret or forward, reverse and positioning accuracy.
(3)The function test is different according to the situation of the order, and the function is also different. Each function can be tested according to the specific situation. In order to prevent accidents, it is best to lock the machine for test, and then release the machine for test.
(4)In the edit function test, the state selection switch is placed in the edit position, and a simple program is compiled by ourselves, including various function commands and auxiliary function commands as much as possible. The moving size is limited to the maximum stroke of the machine tool, and the program is added, deleted and modified at the same time.
(5)The automatic state test will lock the machine tool, and use the program to carry out the idling test to verify the correctness of the program. Then release the machine tool, and change the feed rate switch, the fast overshoot switch, and the spindle speed overshoot switch to make the machine tool fully operate under the condition of various changes of the above switches, and then set the overshoot switch at 100% to make the machine run fully and observe whether the machine works normally.
 ASME Flange Bolt Torque Chart (Calculation Formula & Sequence Pattern)
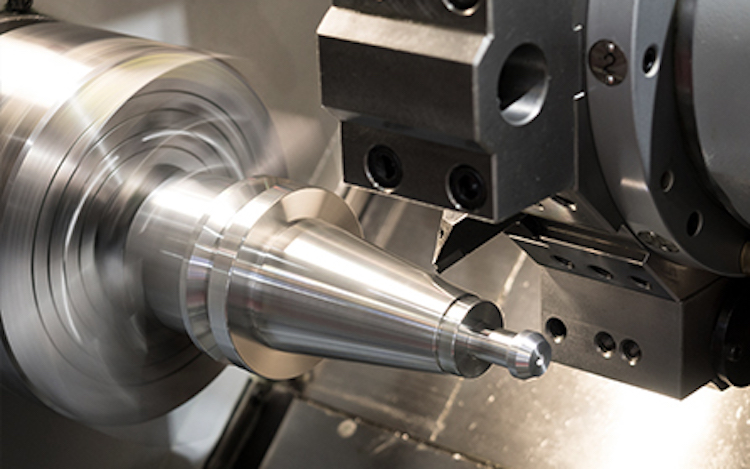
 Tips On How To Run A 9 Axis Lathe
 How To Make CNC Machine Work Stably For A Long Time – Tips To Expand CNC Machine Life
 How To Deal With Failures Of CNC Machine | CNCLATHING
 Top 12 CNC Machining & Programming Experiences | CNCLATHING
 Introduction to Mini Milling Machine | Best Mini Milling Machine 2020 | CNCLATHING
