- Home
- Machining techniques
- CNC Machining Services
- Cooperative supply services
- Designs
- Materials
- Finishing Services
- Shop
- Products
- Guide
- About Us
- Contact Us
2021.2.24
Metal 3D Printing allows you to create highly complex designs that are lightweight, strong, and ideal for applications such as motorsport, aerospace, and medical. To get the most out of Metal 3D Printing, you need to adhere to certain fundamental engineering and design rules. In these guidelines, we are going to give you 7 simple design tips for metal 3D printing.

#Tip 1: Optimize For The Process
Just as you wouldn’t expect to throw a complex sheet metal part at a sand-casting foundry, you should not expect to throw a typical CNC machined part at a Metal 3D Printing company. So, if you don’t have experience designing for Metal 3D Printing, you really should speak with your supplier before you start to design your part and get their advice.
#Tip 2: Put Your Part On A Diet
There are two fundamental types of Metal 3D Printing technologies out there: The first is Laser or beam-based technology, and the other is a Multi-Jet-Printing technology. Nowadays, most laser or beam technologies are used to melt the powder to make an almost 100% solid metal part of the correct size directly in the printing machine. Most Multi-Jet Printing technologies, however, use a kind of resin to bind particles of metal together, and later, in a secondary process, the resulting parts are sintered. This usually results in a 50% shrinkage by volume, which doesn’t necessarily mean that they are inherently inaccurate. The shrinkage is quite predictable. The build time for laser-based direct metal melting technologies is very closely related to the volume of the material used, and to a lesser degree the height of the build; whereas the Multi-Jet-Printing with sintering technologies are pretty much the opposite, with the height of build is the main consideration and volume being a secondary one, except for the cost of the material itself. If you want fat parts making, then Multi-Jet and sintering is probably the better option; but if you want to get accurate and almost 100% solid metal parts with very high strength, you’re going to need to put your parts on a diet and keep their weight to an absolute minimum.
There are so many awesome 3D CAD systems out there that help you to do this kind of design. These kinds of systems evolve the design through multiple iterations, mimicking the efficiency of nature, allowing you to use the absolute minimum material.
Tip 3: Metal 3D Printing Is Not A CNC Replacement
Too many people expect high precision from Metal 3D Printing, and although the precision of these technologies is way better than it used to be ten years ago, it is still not precision machining. Typically, you can expect +/-0.1 to 0.2mm, but this is not a hard and fast rule. Parts can buckle and twist due to the design or the volume of the parts, so you can occasionally see parts as much as 1 or even 2 mm away from CAD. It’s rare, but it does happen if the general rules of Metal 3D Printing are broken. We strongly recommend using a secondary machining process if you want to achieve any features that are high precision. Tapped holes, reamed or bored holes, and certain critical faces or features can all be done after printing. This way, you get the best of both worlds; impossible to machine structures with a few high precision features, only where needed.
#Tip 4: Don’t Go Too Far With The Dieting
Just as being too thick is not good, being too thin can also be problematic. We strongly recommend that you keep wall thicknesses greater than 0.5mm, otherwise the features can distort due to the temperatures involved.
#Tip 5: Holes, Slots, And Gaps
Keep your horizontal or vertical round holes, slots, or gaps also bigger than 0.5mm, otherwise they will just fuse with the opposite wall and cease to exist in the build.
#Tip 6: Large Overhangs
Keep any overhangs in the part below 0.5mm if you want to avoid us having to use fillet supports, which are expensive to remove. If you have noticed, there is a 0.5mm theme going on here. You can see from our test samples that when we create a horizontal square or rectangular hole, the wider the hole is, the more likely the flat ceiling is going to collapse due to a lack of support in the powder bed. To avoid this, you can have rounded or sloping ceilings to counteract that effect. Sloping ceilings are by far the most efficient and can be used up to the very largest holes because the 45-degree slope is self-supporting, whereas the rounded ceiling starts to break down when you get above 4 or 5mm in width.
Tip 7: Self-Supporting Structures
Commonly, companies use a Fast EDM Wire Eroder to take the main supports off, and then we have to use a rotary grinder and other industrial tools to get the rest off. The building and removal of supports for laser melted parts costs time and money, so we strongly recommend avoiding designs that require them in the first place. This is possible if you understand the Metal 3D Printing process. You can design the part such that it is self-supporting in the Z direction of the build. So long as all walls are greater than 45 degrees to the horizontal, they will be self-supporting and not require additional supports.
That’s all for the design guidelines on how to use the metal 3D printing, and click HERE to see more!
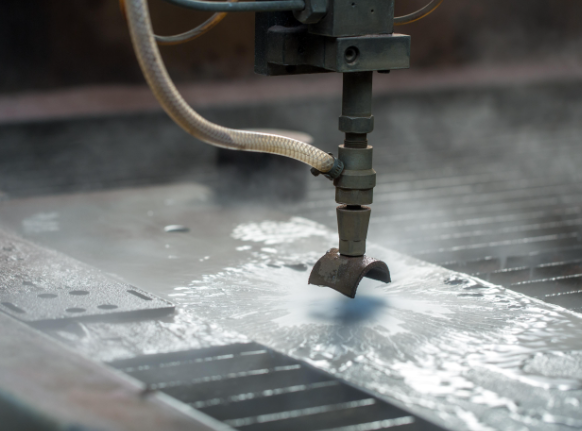 Best Waterjet Machines – How to Choose the Right Waterjet Cutting Machine
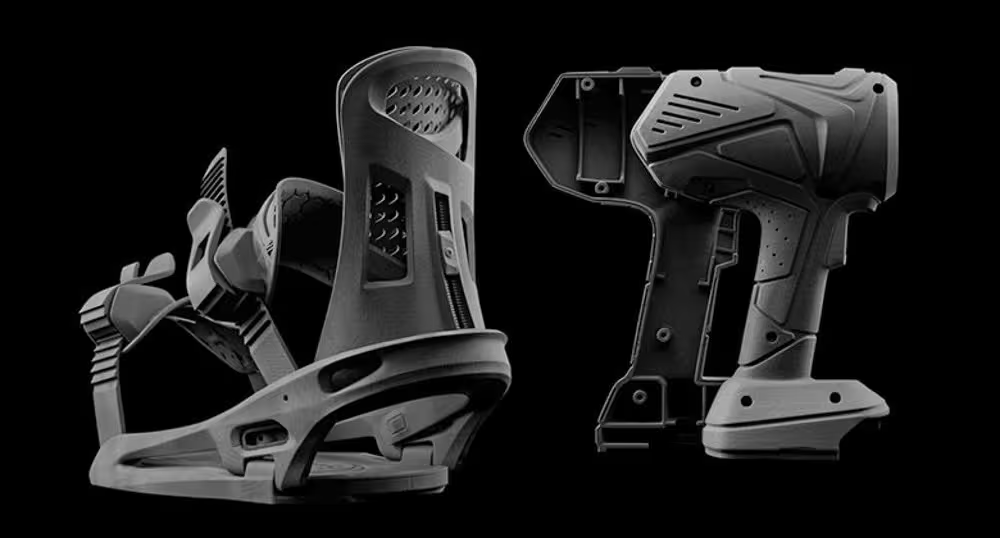 What is Multi Jet Fusion & How It Work – HP MJF 3D Printing Principle, Benefits, Price, Applications
Waterjet Cutting Materials: What Materials Can Be Cut With A Waterjet?
What is Multi Jet Fusion & How It Work – HP MJF 3D Printing Principle, Benefits, Price, Applications
Waterjet Cutting Materials: What Materials Can Be Cut With A Waterjet?
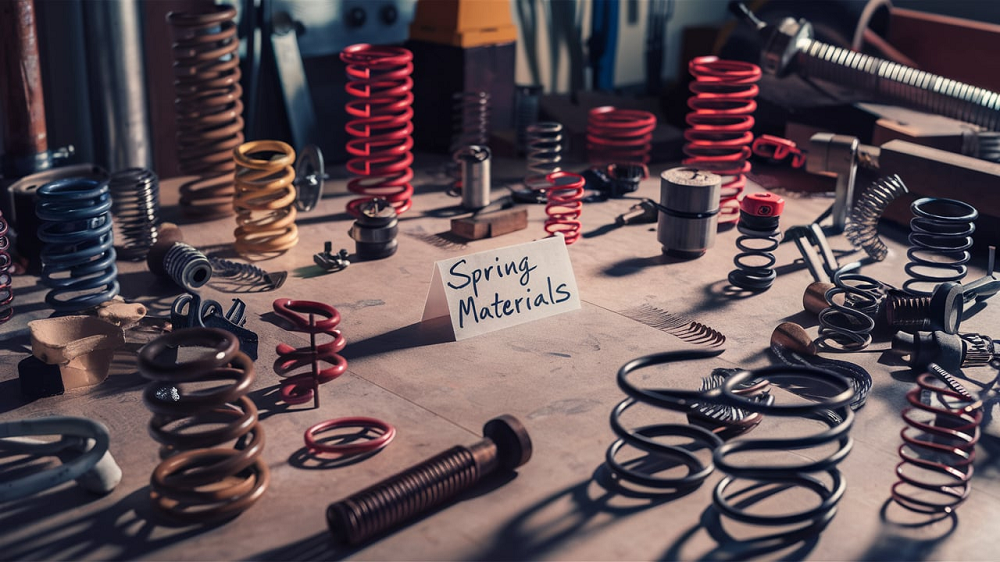 Spring Material Types (Properties, Grades, Uses) & Best Selection for Your Project
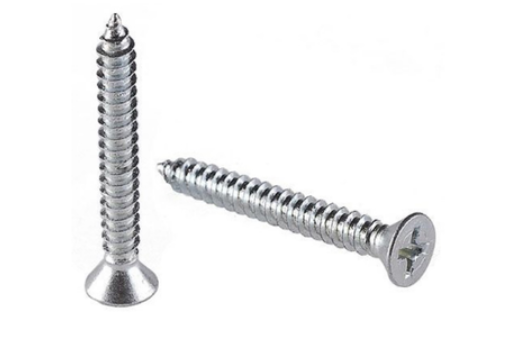 Guide to Self Tapping Screw – Self Tapping Screws vs Self Drilling Screws
 What Is Waterjet Cutting – Applications, Uses, Types, How Does Waterjet Cutting Work
